
Introduction
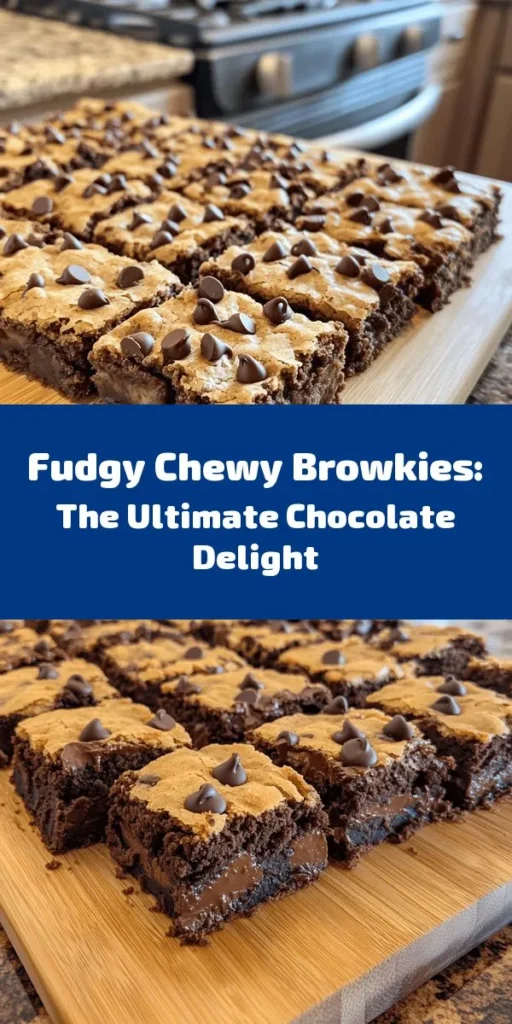
Dessert lovers, rejoice! If you’re on a quest for the ultimate sweet treat that perfectly marries the rich, fudgy essence of brownies with the chewy, delightful texture of cookies, look no further than the recipe for The Best Fudgy Chewy Browkies. These mouthwatering delights are not just a dessert but an experience, crafted to satisfy even the most discerning sweet tooth. Ideal for birthdays, holiday gatherings, or just a cozy night in, browkies are the perfect way to indulge.
In this article, we will delve into the intricate world of browkies, exploring their origins and unique characteristics. You will also find a detailed list of ingredients that ensure your browkies are packed with flavor and a step-by-step guide to achieving dessert perfection. Prepare yourself for a culinary adventure that promises to impress family and friends alike!
Understanding Browkies: A Perfect Dessert Fusion
Exploring the Concept of Browkies
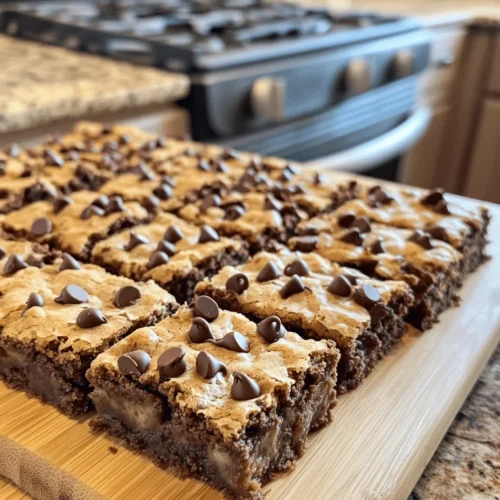
The term “browkies” is a delightful blend of “brownies” and “cookies,” and it encapsulates what makes this dessert so special. Imagine biting into a treat that offers the rich chocolate flavor of a brownie while maintaining the delightful chewiness of a cookie. This fusion creates a unique dessert that stands out in the crowded landscape of sweet treats, and it’s no wonder browkies have gained popularity in modern baking.
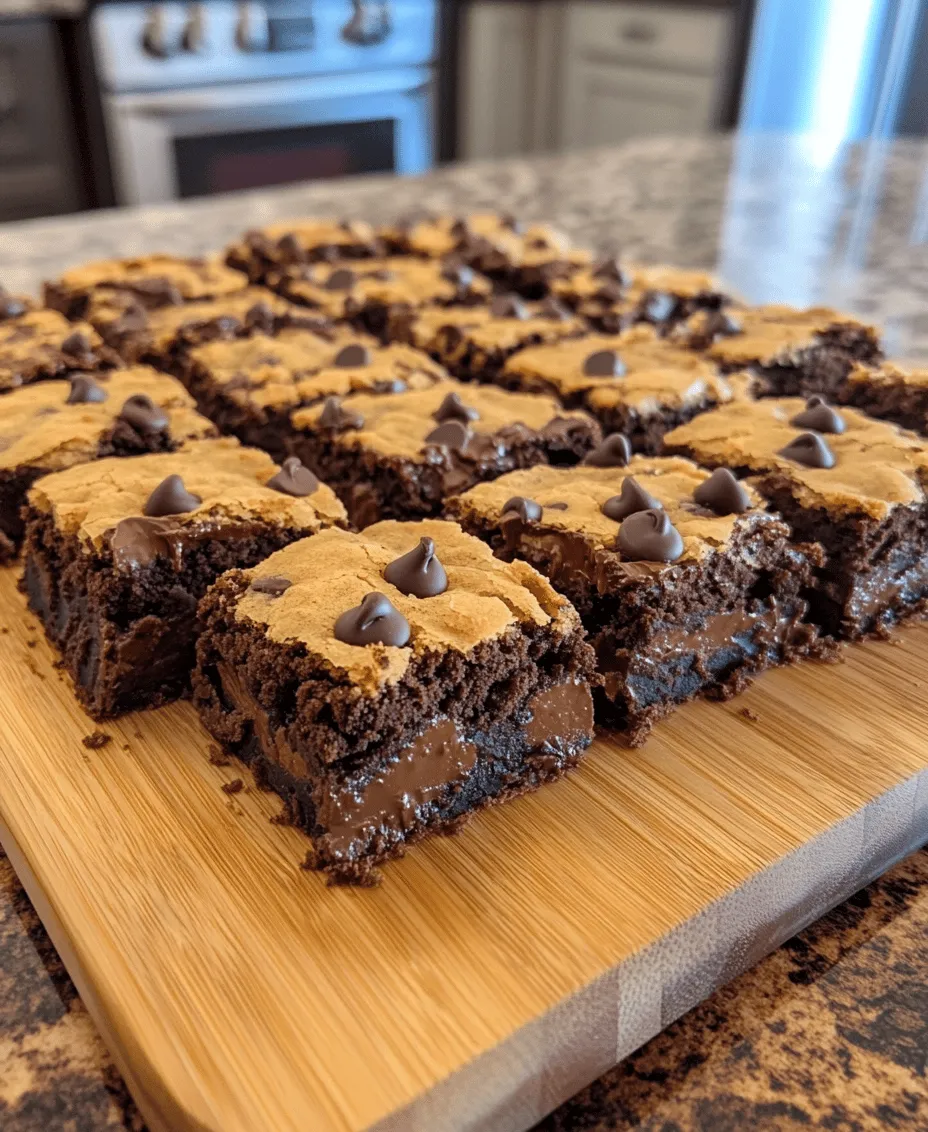
The concept of browkies might seem simple, but the balance of flavors and textures can be quite intricate. Each layer plays a vital role in creating an unforgettable dessert experience. The brownie layer is typically dense and fudgy, while the cookie layer adds a contrast of chewiness that complements the deep chocolate notes. Together, they create a harmonious union that satisfies all cravings in one bite.
Defining the Unique Blend of Brownie and Cookie
At their core, browkies are designed to deliver the best of both worlds. The brownie component is rich and decadent, often featuring cocoa powder and chocolate, while the cookie portion brings a lightness and chewiness through its unique combination of sugars and fats. This duality is what makes browkies so appealing — they are not just a hybrid of two desserts; they are a thoughtfully crafted combination that enhances the flavors and textures of each.
The texture of a perfect browkie should be soft and fudgy at the center, with a slightly crisp edge that gives way to that chewy cookie goodness. This delightful contrast is achieved through precise measurements and baking techniques, which we will cover in detail. Whether enjoyed warm out of the oven or at room temperature, browkies promise to tantalize your taste buds and leave you craving more.
The Popularity of Browkies in Modern Baking
In recent years, browkies have surged in popularity, becoming a staple in bakeries and homes alike. Their unique charm lies in their versatility; they can be dressed up with various mix-ins such as nuts, caramel, or even a swirl of peanut butter for added flavor. Social media platforms have played a significant role in their rise to fame, with bakers sharing their own takes on this delightful treat, inspiring countless others to try their hand at creating these delicious desserts.
Browkies cater to every occasion, from casual family gatherings to formal celebrations, making them a go-to recipe for bakers of all skill levels. Their appeal lies not just in their flavor but also in the joy they bring to those who bake and share them. Whether you are a seasoned baker or an enthusiastic novice, making browkies is a rewarding experience that results in a treat that is sure to impress.
Ingredients Breakdown: The Secrets to Flavorful Browkies
Before we dive into the step-by-step instructions for creating these delicious browkies, it’s essential to understand the ingredients that contribute to their rich flavor and delightful texture. Each component plays a significant role, and knowing their functions can help you make informed choices when preparing your batch.
The Brownie Layer
1. Importance of Unsalted Butter: When making the brownie layer, unsalted butter is preferred as it allows for better control over the salt content in your dessert. Using unsalted butter ensures that the rich chocolate flavor can shine without any overpowering saltiness.
2. Role of Granulated and Brown Sugar: A combination of granulated sugar and brown sugar is used in the brownie layer to create the perfect depth of flavor. Granulated sugar contributes to the structure, while brown sugar adds moisture and a hint of caramel flavor, resulting in a soft and fudgy texture.
3. Eggs and Their Functions in Baking: Eggs are crucial in brownie recipes as they act as a binding agent, helping to create that rich, fudgy texture. They also add moisture and contribute to the overall structure, ensuring your browkies hold together beautifully.
4. How Cocoa Powder Enhances Chocolate Flavor: High-quality cocoa powder is essential for achieving that intense chocolate flavor that brownies are known for. It adds richness and depth to the brownie layer while complementing the cookie layer perfectly.
5. Choosing the Right Chocolate Chips: When it comes to chocolate chips, semi-sweet or dark chocolate chips are ideal for browkies. They melt beautifully and contribute to the dessert’s overall chocolate experience, creating pockets of gooey chocolate in every bite.
The Cookie Layer
1. Softened Butter vs. Melted Butter: What’s Best?: For the cookie layer, softened butter is typically recommended as it helps to create a light and airy texture. While melted butter can be used in some cookie recipes, it often leads to a denser cookie. Softened butter allows for better incorporation of air, resulting in a chewier texture.
2. The Balance of Sugars for Chewy Texture: Similar to the brownie layer, the cookie layer benefits from a mix of granulated and brown sugar. The granulated sugar helps with spreading, while brown sugar adds moisture and chewiness, ensuring your cookies are not too crisp.
3. The Impact of Baking Soda in Cookie Dough: Baking soda is a key ingredient in the cookie layer, providing leavening and contributing to the chewiness of the final product. It reacts with the acidic components in the dough, helping the cookies rise slightly while keeping them soft.
4. Selecting the Right Flour for Cookies: All-purpose flour is the best choice for the cookie layer, offering the right balance of protein and gluten content needed to achieve a chewy texture. Be sure to measure your flour accurately to avoid dense cookies.
5. Semi-Sweet Chocolate Chips: A Flavor Profile: Just like in the brownie layer, semi-sweet chocolate chips are a classic choice for the cookie layer. Their rich chocolate flavor complements the cookie’s sweetness, creating a perfect balance that enhances the overall browkie experience.
Step-by-Step Instructions for Perfect Browkies
With a clear understanding of the ingredients that make up our delicious browkies, it’s time to jump into the step-by-step instructions that will guide you through the baking process.
Preheat the Oven
Before you start mixing your ingredients, it’s essential to preheat your oven to the right temperature. This step is crucial for ensuring even baking and achieving that perfect texture.
– Importance of Proper Oven Temperature: Browkies should be baked at 350°F (175°C). Preheating your oven not only ensures that your browkies bake evenly but also helps them rise correctly, creating that desirable fudgy center.
– Preparing the Baking Pan for Easy Removal: Prepare a 9×13-inch baking pan by greasing it lightly with butter or non-stick spray. For added convenience, you can line the bottom of the pan with parchment paper, allowing for easy removal of your browkies once they are baked.
Creating the Brownie Layer
Now that your oven is preheated and your pan is ready, it’s time to create the rich brownie layer that will serve as the foundation for your browkies.
1. Melt the Butter: In a medium saucepan over low heat, melt the unsalted butter. Once melted, remove it from the heat and allow it to cool slightly.
2. Combine Sugars and Eggs: In a mixing bowl, combine the melted butter with both the granulated and brown sugars. Stir until well combined. Next, add in the eggs, one at a time, mixing thoroughly after each addition. This ensures a smooth and creamy consistency.
3. Incorporate Cocoa Powder and Chocolate Chips: Sift in the cocoa powder and mix until fully incorporated. Then, fold in your choice of chocolate chips, ensuring they are evenly distributed throughout the mixture.
4. Add the Flour: Finally, gently fold in the all-purpose flour until just combined. Be careful not to overmix, as this can lead to a dense brownie layer. The batter should be thick and fudgy.
5. Spread in the Pan: Pour the brownie batter into the prepared baking pan, using a spatula to spread it evenly across the bottom.
Next Steps
Once you have prepared the brownie layer, the next step will involve creating the cookie layer and layering it over the brownie batter. But before we dive into that, it’s essential to ensure that you have all your ingredients ready and understand the baking process to achieve the best results.
Stay tuned as we continue this journey into the world of browkies, where we will explore the cookie layer and share tips that will elevate your baking game!
Melting Butter: Tips to Avoid Overheating
When it comes to melting butter for your browkies, maintaining the right temperature is crucial. Overheating can lead to a greasy, undesirable texture, which can impact the outcome of your delicious treats. To achieve the perfect melt, opt for a low and slow approach. Use a microwave-safe bowl and heat the butter in short bursts of 10-15 seconds, stirring in between. This method ensures that the butter melts uniformly without reaching temperatures that could alter its properties. Alternatively, you can melt the butter in a saucepan over low heat on the stove, stirring continuously to prevent any hotspots.
Combining Sugars: Achieving a Smooth Mixture
Once your butter has melted and cooled slightly, it’s time to combine it with the sugars. Using both brown and granulated sugars not only enhances the flavor but also contributes to the browkies’ chewy texture. In a large mixing bowl, combine the melted butter with the sugars and whisk until the mixture is smooth and glossy. This step is essential as it incorporates air into the mixture, contributing to the overall fluffiness of your browkies. Aim for a consistency that is fully blended with no lumps of sugar remaining.
The Importance of Sifting Dry Ingredients
Sifting your dry ingredients is a step often underestimated in baking, but it plays a significant role in ensuring your browkies have the right texture. By sifting together flour, cocoa powder, and baking soda, you’re removing any lumps and aerating the ingredients, which allows for better mixing with the wet ingredients. Sift these ingredients directly into the bowl containing your butter and sugar mixture, and gently fold them together. This technique minimizes overmixing and helps create that perfectly chewy texture we all crave.
Preparing the Cookie Layer
Creaming Butter and Sugars: The Key to Fluffiness
Now that your dry ingredients are prepped, let’s focus on preparing the cookie layer of your browkies. Begin by creaming room temperature butter with both sugars until light and fluffy. This process typically takes about 3-5 minutes with an electric mixer set on medium speed. The creaming process is vital as it incorporates air into the butter, resulting in a lighter cookie layer. Once the mixture turns pale and fluffy, it’s time to add the eggs, one at a time, ensuring each egg is fully incorporated before adding the next.
Mixing Techniques for a Uniform Dough
With your eggs mixed in, it’s essential to mix the ingredients gently to form a uniform dough. Gradually add the sifted dry ingredients to the butter and sugar mixture. Use a spatula or wooden spoon to fold the ingredients together, being careful not to overmix. Overmixing can lead to tough browkies, which is the opposite of what we want. Mix until just combined, and you can still see a few flour streaks; this means you’re on the right track.
Folding in Chocolate Chips: Ensuring Even Distribution
Now comes the fun part—folding in the chocolate chips! Use a spatula to gently fold in your choice of chocolate chips (semi-sweet, dark, or even white chocolate). This step is crucial for ensuring that every bite of your browkies is bursting with chocolatey goodness. Aim for an even distribution throughout the dough, and don’t be afraid to add a few extra chips if you’re feeling indulgent!
Layering and Baking
Techniques for Spoon Spreading the Cookie Layer
With your dough ready, it’s time to layer it over the brownie base. Use a spoon or a spatula to spread the cookie layer evenly over the brownie layer. To achieve a smooth finish, you can start by placing dollops of the cookie dough across the brownie surface and then gently spread it outwards using the back of the spoon. This technique ensures that the cookie layer evenly covers the brownie, creating that signature browkie look.
Understanding Baking Time: Achieving the Perfect Texture
Baking your browkies requires attention to detail, especially regarding timing. Preheat your oven to 350°F (175°C) and bake the browkies for about 25-30 minutes. The key here is to keep an eye on the edges as they will firm up faster than the center. You want the edges to be set while the middle remains slightly soft, which will contribute to that fudgy texture we love.
Using the Toothpick Test for Doneness
To ensure your browkies are perfectly baked, employ the toothpick test. Insert a toothpick into the center of the browkies; if it comes out with a few moist crumbs attached, they are done. If it comes out wet with batter, give them a few more minutes. Remember, they will continue to cook slightly after removing them from the oven, so it’s always better to underbake slightly than to overbake.
Cooling and Serving
The Right Way to Cool Browkies
Once your browkies are out of the oven, allow them to cool in the pan for about 10-15 minutes. This cooling period helps them set and makes them easier to cut. After that, transfer them to a wire rack to cool completely. Cooling on a rack allows air to circulate around the browkies, preventing them from becoming soggy.
Tips for Cutting Perfect Squares
To achieve clean cuts and perfect squares, use a sharp knife and ensure it’s lightly greased or warmed under hot water. Start by cutting the edges first to create a border, and then proceed to slice down the middle. This method prevents the chocolate from smearing and keeps your squares looking tidy and inviting. For a polished finish, you can even dust the top with a little powdered sugar before serving.
Variations and Customizations for Browkies
Incorporating Nuts for Added Crunch
For those who love a little extra crunch, consider adding chopped nuts to your browkies. Walnuts or pecans complement the chocolate beautifully and add a delightful texture contrast. Simply fold in about half a cup of your choice of nuts along with the chocolate chips for an added layer of flavor.
Experimenting with Different Types of Chocolate
Don’t hesitate to experiment with different types of chocolate in your browkies. You can use a mix of dark, milk, and white chocolate chips for a rainbow of flavors. Alternatively, try using chocolate chunks for a more rustic look and texture. The variety will enhance the overall taste experience and make each bite unique.
Creating a Swirled Effect with Peanut Butter or Caramel
For a decadent twist, consider swirling in peanut butter or caramel sauce into the brownie layer before adding the cookie layer. Simply dollop spoonfuls of your chosen spread and use a knife to create swirls. This method not only adds flavor but also creates a visually appealing dessert.
Adjusting for Dietary Preferences: Gluten-Free or Vegan Options
If you have dietary preferences to consider, browkies can easily be adapted. Use gluten-free flour blends to make them gluten-free, ensuring to check that all other ingredients, like chocolate chips, are also gluten-free. For a vegan version, substitute butter with coconut oil or vegan butter and use flax eggs (1 tablespoon ground flaxseed mixed with 2.5 tablespoons water) in place of eggs. The result is still a fudgy and chewy delight that everyone can enjoy.
The Science Behind Browkies: Why They Work
Understanding the Chemistry of Baking
Baking browkies is not just an art; it’s a science! The successful combination of ingredients and techniques leads to the ultimate fudgy and chewy texture. Flour provides structure, while sugars contribute to moisture and sweetness. The eggs act as a binding agent and help in leavening, while the chocolate adds richness.
How Ingredients Interact During Baking
As the browkies bake, the sugars caramelize, creating that beautiful golden crust, while the chocolate melts and binds with the other ingredients. The combination of butter and sugars aerates the mixture, resulting in a light and fluffy cookie layer that perfectly complements the dense brownie base.
The Role of Temperature in Texture
Temperature plays a significant role in the final texture of your browkies. Baking at the right temperature ensures that the edges set while keeping the center soft and fudgy. If the oven is too hot, the edges may overbake before the center has a chance to cook properly. Conversely, a lower temperature might not give the right rise and texture.
Conclusion
The Best Fudgy Chewy Browkies are more than just a sweet treat; they are a testament to the joy of baking and the magic of flavor combinations. With this comprehensive guide, you’ll not only be able to create these delicious desserts but also understand the intricacies involved in their preparation. Whether for a gathering or a personal indulgence, browkies are sure to be a hit that leaves everyone wanting more. As you embark on this baking adventure, you’ll find that each step brings you closer to the perfect balance of fudginess and chewiness, making these browkies an unforgettable addition to your dessert repertoire. So roll up your sleeves, gather your ingredients, and get ready to impress your friends and family with the ultimate browkie experience!