
Introduction
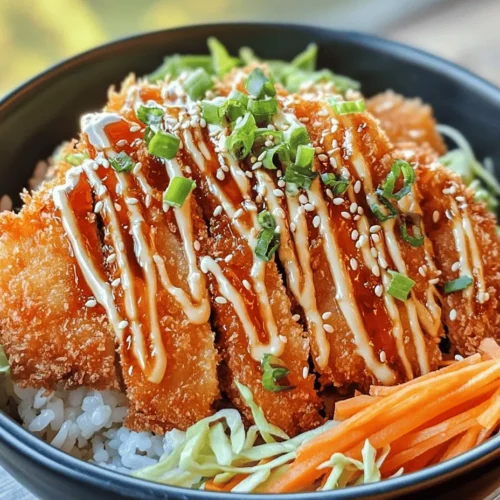
In the world of Japanese cuisine, few dishes are as beloved as the crispy katsu bowl. This mouthwatering dish features perfectly fried pork katsu, which is a breaded and deep-fried cutlet, served over a bed of fluffy rice and accompanied by an array of fresh vegetables. The highlight of this bowl is the homemade tonkatsu sauce, a sweet and tangy condiment that elevates the flavors of the dish and adds a unique twist to the experience.
The appeal of katsu bowls lies not only in their delicious taste but also in the delightful contrast of textures. The crispiness of the katsu complements the softness of the rice, while the sauce adds a rich depth of flavor. Whether you’re looking to impress guests at a dinner party or simply craving a comforting meal, this recipe for crispy katsu bowls with homemade tonkatsu sauce is sure to satisfy.
As we delve into this article, we will take a closer look at the key ingredients, the step-by-step preparation process, and the cultural significance of katsu in Japanese cuisine. From its humble origins to its evolution into a contemporary favorite, katsu has become a symbol of comfort food that resonates with people all over the world.
Understanding Katsu and Its Cultural Significance
Exploring the Origins of Katsu
The term “katsu” is derived from the Japanese word “katsuretsu,” which means cutlet. It is believed that katsu originated in the late 19th century during the Meiji era, a time when Western culinary influences began to permeate Japanese cuisine. The practice of breading and frying meat was inspired by European cooking methods, particularly the French “côtelette” and the German “Schnitzel.”
Initially, katsu was made using beef, but over time, pork became the more popular choice due to its affordability and flavor. Today, pork katsu is the most common variant, although chicken and even fish katsu can also be found in various incarnations. This dish not only showcases the adaptability of Japanese cuisine but also reflects a blending of cultural influences, resulting in a cherished staple that has stood the test of time.
Highlighting Its Evolution in Japanese Cuisine
As Japanese cuisine evolved, so did the preparation and presentation of katsu. Originally served in Western-style restaurants, katsu soon made its way into casual dining and home cooking. The advent of panko breadcrumbs, which are coarser and airier than traditional breadcrumbs, contributed significantly to the crispy texture that katsu is renowned for today.
In addition to its traditional presentation, katsu has been embraced in various forms, such as katsu sandwiches (katsu sando) and katsu curries, further solidifying its status in the culinary world. The versatility of katsu means it can be adapted to suit different tastes and dietary preferences, making it a beloved dish that appeals to a wide audience.
Discussing the Popularity of Katsu Bowls in Contemporary Dining
In recent years, katsu bowls have surged in popularity, particularly in urban dining scenes and food markets. The convenience of a one-bowl meal, combined with the delicious flavors and textures of katsu, makes it an attractive option for busy individuals and families. Katsu bowls often incorporate seasonal vegetables, adding a fresh touch and nutritional balance to the dish.
Moreover, the rise of food blogs and social media platforms has allowed home cooks and chefs to share their unique interpretations of katsu bowls. This visibility has led to an increased interest in recreating this dish at home, encouraging culinary experimentation and a deeper appreciation for Japanese cuisine.
Ingredients Breakdown
To create the perfect crispy katsu bowls with homemade tonkatsu sauce, it’s essential to use high-quality ingredients that contribute to the overall flavor and presentation. Below, we’ll break down the key components of the dish.
Tonkatsu Sauce
The soul of a katsu bowl lies in its tonkatsu sauce. This rich and flavorful condiment is typically made from the following ingredients:
1. Ketchup: Adds sweetness and tanginess.
2. Worcestershire Sauce: Provides depth and umami.
3. Soy Sauce: Introduces a salty element.
4. Mirin: Sweet rice wine that enhances the sauce’s flavor profile.
5. Sugar: Balances the acidity of the ketchup and adds sweetness.
6. Garlic Powder: Adds warmth and complexity.
7. Mustard Powder (optional): A hint of spice to elevate the sauce.
Importance of Each Ingredient in Flavor Development
Each ingredient in the tonkatsu sauce plays a critical role in developing the unique flavor profile that pairs perfectly with the crispy katsu. The combination of sweet, tangy, and umami flavors creates a well-rounded sauce that enhances the overall experience of the dish.
Variations and Substitutions for Dietary Needs
For those with dietary restrictions, there are several ways to adapt the tonkatsu sauce. Gluten-free soy sauce can be used for those with celiac disease or gluten intolerance. Additionally, you can substitute agave syrup or honey for sugar to cater to different dietary preferences. Experimenting with different flavor profiles, such as adding a splash of sake or a dash of chili powder, can also yield delicious results.
Katsu
The katsu itself is the star of the dish, and selecting the right cut of pork is crucial for achieving the best results. Here are some key considerations:
1. Choosing the Cut of Pork: The most common cuts for katsu are pork loin or pork tenderloin. Pork loin offers a balance of flavor and tenderness, while pork tenderloin is leaner and cooks quickly.
2. Panko Breadcrumbs: The significance of using panko breadcrumbs cannot be overstated. These Japanese-style breadcrumbs are coarser than traditional breadcrumbs, resulting in a lighter and crispier texture when fried. They are essential for achieving that signature crunch that elevates the katsu’s appeal.
Bowl Components
A well-constructed katsu bowl is more than just rice and katsu; it’s a harmonious blend of flavors and textures. Here’s what you’ll need:
1. Rice: Short-grain Japanese rice is ideal for katsu bowls, as it has a sticky texture that holds up well under the katsu and sauce. The rice serves as a neutral base that balances the richness of the katsu and the sauce.
2. Fresh Vegetables: Incorporating fresh vegetables not only adds color and vibrancy to the dish but also enhances its nutritional value. Common choices include shredded cabbage, sliced cucumbers, and steamed broccoli. These vegetables can provide a refreshing contrast to the crispy katsu.
3. Optional Garnishes: To elevate the presentation and flavor, consider adding garnishes such as pickled ginger, sesame seeds, or chopped green onions. These small touches can add depth and visual appeal to your katsu bowl.
Step-by-Step Preparation
Now that we’ve covered the essential ingredients for crispy katsu bowls with homemade tonkatsu sauce, let’s dive into the preparation process. We will start with the preparation of the tonkatsu sauce, which can be made ahead of time and stored in the refrigerator for up to a week.
Preparing the Tonkatsu Sauce
1. Combine Ingredients: In a bowl, whisk together the ketchup, Worcestershire sauce, soy sauce, mirin, sugar, garlic powder, and mustard powder (if using) until well combined.
2. Adjust Consistency: If the sauce seems too thick, you can add a splash of water or additional mirin to achieve your desired consistency. The sauce should be thick enough to coat the back of a spoon but pourable enough to drizzle over the katsu.
3. Taste and Adjust: Give the sauce a taste and adjust the seasoning if necessary. You can add more sugar for sweetness, soy sauce for saltiness, or Worcestershire sauce for an extra umami kick.
4. Store or Serve: Once prepared, transfer the tonkatsu sauce to an airtight container and refrigerate until ready to use. It can be served immediately, but allowing it to sit for a few hours or overnight will enhance the flavors.
With the tonkatsu sauce ready, you can now focus on preparing the katsu and assembling the bowl. In the next section, we will cover the detailed process of preparing the pork katsu, frying it to crispy perfection, and assembling your delicious katsu bowl. Stay tuned for more culinary insights and step-by-step instructions that will lead you to a delightful dining experience!
Preparing the Pork Katsu
To create the ultimate crispy katsu, the preparation of the pork is crucial. Start with quality pork chops, preferably boneless, around half an inch thick. This thickness ensures that your katsu cooks evenly and achieves a perfect crisp. Here are the key steps and techniques for successfully breading your pork chops.
Proper Techniques for Breading Pork Chops
1. Prepare Your Station: Set up a clean and efficient breading station. You’ll need three shallow dishes: one for all-purpose flour, one for beaten eggs, and one for panko breadcrumbs. This organization minimizes mess and maximizes efficiency.
2. Season Each Component: Begin by seasoning the flour with salt and pepper. This step is vital as it adds flavor directly to the meat. You can also add a pinch of garlic powder for an extra kick. Next, season the beaten eggs lightly with salt. This ensures that every layer of the katsu is flavorful.
3. Dredging Process: Start with the flour, coating the pork chop evenly. Shake off the excess flour before moving to the egg wash. The egg acts as a glue, helping the breadcrumbs adhere better. After the egg wash, coat the pork chop generously with panko breadcrumbs. Press the breadcrumbs onto the meat to ensure even coverage, creating a thick crust that will crisp beautifully upon frying.
Importance of Seasoning at Each Step
Seasoning is not just an afterthought; it plays a pivotal role in enhancing the overall flavor of your katsu. By seasoning each layer—flour, egg, and panko—you build a depth of flavor that elevates the dish. Remember, the pork itself should also be lightly salted before breading. This layered approach ensures that every bite is flavorful and satisfying.
Tips for Maintaining a Clean and Efficient Breading Station
– Keep One Hand Wet and One Hand Dry: When breading, designate one hand for the wet ingredients (eggs) and one for the dry (flour and panko). This technique prevents clumping and makes the process smoother.
– Use a Baking Sheet: After breading each pork chop, place it on a baking sheet lined with parchment paper. This keeps your workspace tidy and allows you to prepare multiple pieces without overcrowding.
– Clean as You Go: Wipe down your surfaces and utensils periodically. A clean workspace not only looks better but also helps maintain focus and efficiency in the kitchen.
Frying the Katsu
Now that your pork katsu is breaded to perfection, it’s time to fry it. This step is crucial for achieving that iconic crispy texture.
Ideal Oil Temperature for Frying
The ideal oil temperature for frying pork katsu is around 350°F (175°C). Use a deep-frying thermometer to ensure accuracy. If the oil is too hot, the katsu will burn before cooking through; too cool, and the katsu will absorb excess oil, resulting in a soggy crust.
Techniques for Achieving a Golden-Brown Crust
1. Fry in Batches: Depending on the size of your frying pan, fry one or two pieces at a time. Overcrowding the pan can lower the oil temperature, leading to uneven cooking.
2. Monitor Cooking Time: Each pork chop will take about 3-4 minutes per side. Look for a golden-brown color and a crisp texture. The internal temperature should reach 145°F (63°C) for safe consumption.
3. Use a Slotted Spoon: Carefully turn the pork katsu with a slotted spoon or tongs to avoid splashing hot oil. Once cooked, transfer the katsu to a plate lined with paper towels to absorb excess oil.
Safety Tips for Frying at Home
– Use a Deep Fryer or a Heavy Pot: A deep fryer is the safest option, but if using a pot, ensure it’s heavy and deep enough to prevent splattering.
– Keep a Lid Nearby: In case of an oil fire, have a lid ready to smother the flames. Never use water to extinguish an oil fire.
– Be Cautious with Oil Spills: Clean any oil spills immediately and avoid wearing loose clothing that could catch fire.
Assembling the Katsu Bowls
With your crispy katsu ready, it’s time to assemble the bowls. This step is where you can get creative and make your meal visually appealing.
Layering the Ingredients for Optimal Flavor
1. Start with Rice: Place a generous scoop of steamed white rice or Japanese short-grain rice at the bottom of your bowl. The rice acts as a base that absorbs flavors and balances the dish.
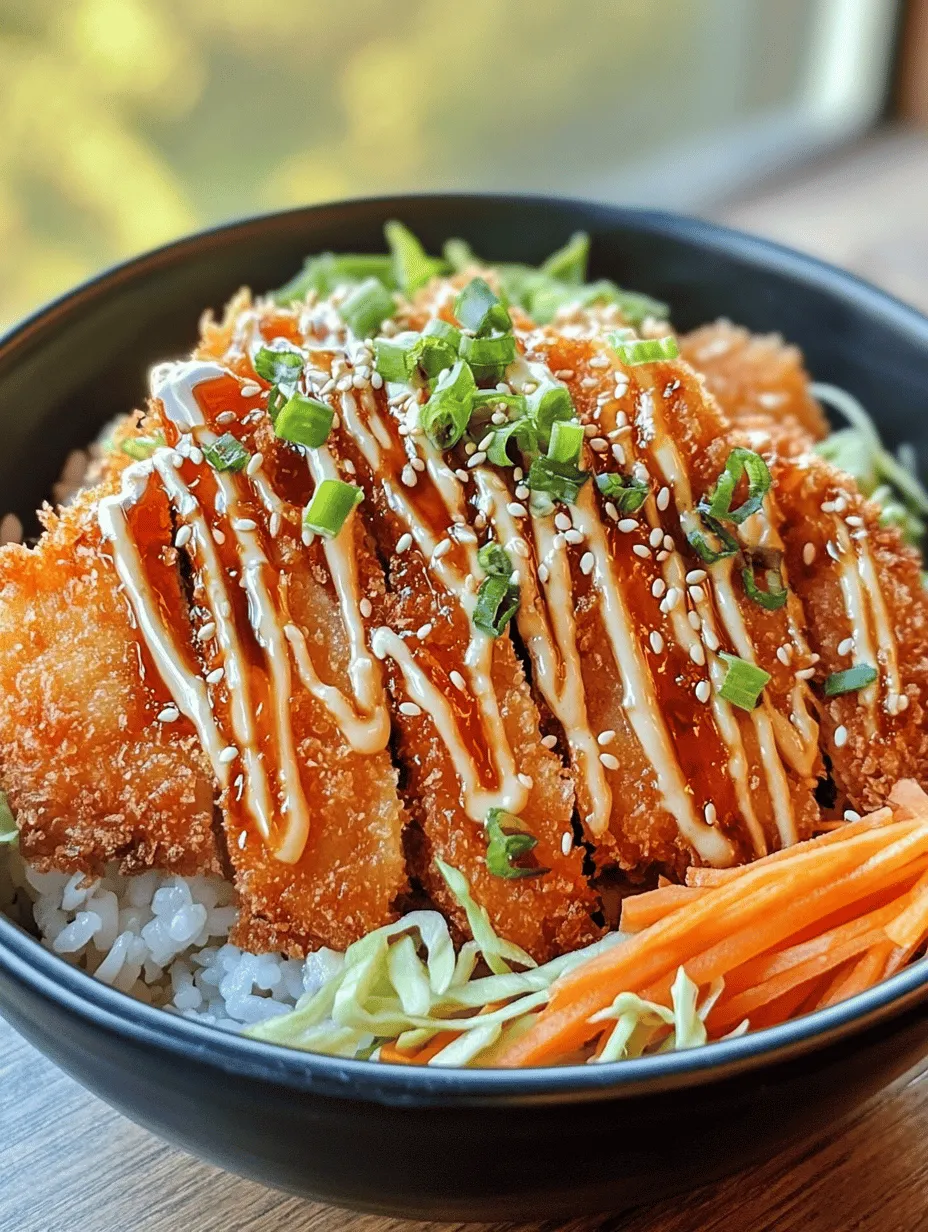
2. Add the Katsu: Slice the fried pork katsu into strips and arrange them artfully on top of the rice. Overlapping the slices slightly adds visual interest.
3. Toppings and Garnishes: Enhance your katsu bowls with toppings such as shredded cabbage, sliced green onions, and pickled ginger. Drizzle homemade tonkatsu sauce generously over the katsu for that signature flavor.
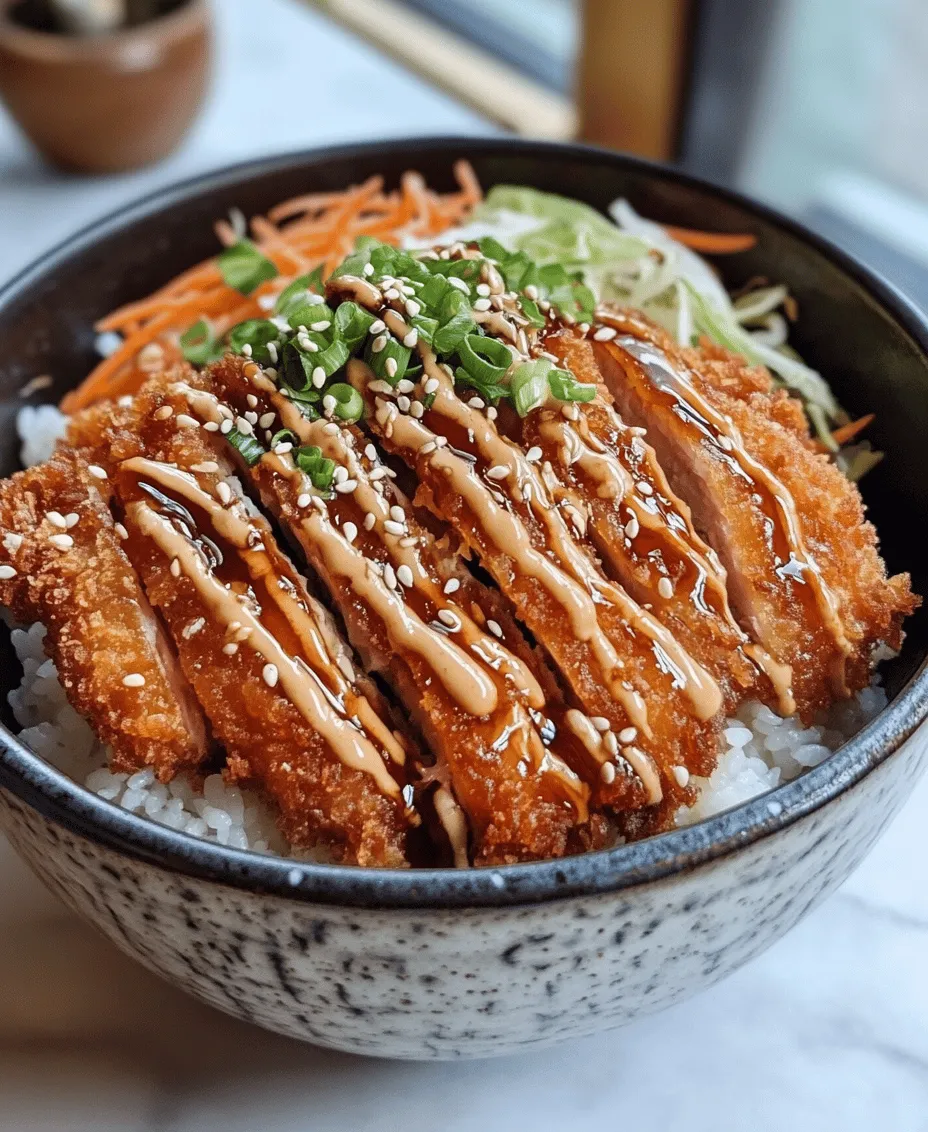
Creative Presentation Ideas to Enhance Visual Appeal
– Use Colorful Bowls: Opt for vibrant bowls to make your dish pop. White or light-colored bowls highlight the golden-brown katsu and the colorful toppings.
– Garnish with Fresh Herbs: A sprinkle of sesame seeds or chopped cilantro can elevate the aesthetic appeal.
– Serve with Side Dishes: Consider serving your katsu bowls with a side of miso soup or a small salad for a complete meal.
Suggestions for Portion Sizes and Serving Styles
When it comes to portion sizes, consider your guests. A standard serving includes a scoop of rice, one or two pieces of katsu, and a handful of toppings. For larger gatherings, you can prepare a family-style serving where everyone helps themselves, allowing for a more interactive dining experience.
Enjoying Your Katsu Bowls
The experience of enjoying katsu bowls is deeply rooted in Japanese culture. Understanding the cultural context can enrich your dining experience.
Traditional Japanese Dining Practices
In Japan, meals are often served in a balanced manner, highlighting the harmony of flavors. Katsu bowls are typically enjoyed with a variety of side dishes, enhancing the overall meal. The emphasis is placed on enjoying the presentation, flavors, and company.
Ideas for Pairing Katsu Bowls with Beverages
Pair your katsu bowls with traditional Japanese beverages for an authentic experience. Green tea complements the savory flavors, while a light lager or sake can enhance the katsu’s richness. Consider serving a refreshing iced tea as a non-alcoholic option.
Nutritional Analysis
Understanding the nutritional content of your katsu bowls can help you make informed choices.
Breaking Down the Nutritional Content of the Dish
A standard serving of katsu bowls (including rice and toppings) typically contains:
– Calories: Approximately 600-800 calories per serving, depending on portion sizes and toppings.
– Protein: The pork katsu provides a significant protein source, with about 30 grams of protein per serving.
– Carbohydrates: The rice contributes around 70-80 grams of carbohydrates, making this a hearty meal.
– Fat: Depending on the frying method, expect around 25-30 grams of fat, primarily from the oil used for frying.
Health Benefits of the Ingredients Used
– Pork: A good source of high-quality protein, pork also contains essential vitamins and minerals such as B vitamins, zinc, and iron.
– Rice: A staple carbohydrate, rice provides energy and is gluten-free, making it suitable for various diets.
– Vegetables: Adding shredded cabbage and other vegetables increases fiber content and provides vitamins and minerals.
Potential Modifications for Healthier Options
– Baking Instead of Frying: For a healthier version, consider baking the breaded pork chops in the oven. Spray with a light coating of oil and bake at 400°F (200°C) for approximately 20 minutes, flipping halfway through.
– Whole Grain Rice: Substitute white rice with brown rice or quinoa for added fiber and nutrients.
– Reduce Sauce Usage: While tonkatsu sauce is delicious, using it sparingly can reduce calories and sugar content.
Conclusion
Crispy katsu bowls with homemade tonkatsu sauce offer a delectable dining experience that captures the essence of Japanese comfort food. With rich flavors and textures, this dish is not only a feast for the palate but also a celebration of cultural culinary traditions. By mastering this recipe, you can bring a taste of Japan into your kitchen, impressing family and friends with your cooking skills and knowledge of one of Japan’s most cherished dishes. Whether you’re enjoying it on a busy weeknight or serving it at a special gathering, katsu bowls are sure to delight and satisfy. So gather your ingredients and get ready to embark on a culinary adventure that brings the heart of Japan to your table.